Choosing the right wildlife photography equipment is a challenge – especially for beginners. The effort and knowledge required to take a unique nature photo is actually greater than is often assumed.
Nature photography is a wide-ranging and diverse field with numerous facets, some of which can differ greatly from one another. However, the right equipment for beginners in nature photography can significantly improve the quality of the photos. A telephoto lens is essential for wildlife photography, while a high-quality camera body forms the basis of all your equipment.
In this pro guide, I’ll show you what equipment you really need for your first steps in wildlife photography. From camera bodies and lenses to important accessories – I’ll help you make the right choice without having to completely slaughter your piggy bank. You’ll also find out why a good lens or a sturdy camera strap will do you more good than a drawer full of accessories that you barely use.
- The right camera for wildlife photography
- Lenses for various animal motifs
- Important accessories for sharp images
- Practical supplements for on the go
- Conclusion
- FAQs

Join me on my photo tours and immerse yourself in the world of wild landscapes and unique encounters. Together we will hone your photographic skills – practical, creative and full of inspiration. Secure your place now and rediscover the magic of light and nature.
The right camera for wildlife photography
When choosing the right camera for wildlife photography, many beginners are faced with a variety of options. A well-chosen camera body forms the foundation of your wildlife photography equipment and is crucial to your chances of success in the field.
DSLR vs. mirrorless camera
Traditionally, digital single-lens reflex cameras (DSLRs) have been the first choice for professional nature photographers. These robust devices offer excellent image quality and a wide range of interchangeable lenses. However, mirrorless system cameras have gained enormous popularity in recent years. These more compact and lighter models enable almost silent shooting – a decisive advantage when photographing shy wildlife.
Mirrorless cameras also score points with more modern autofocus systems, which often offer animal and eye detection. In wildlife photography, it’s pretty cool to be able to track an animal’s eye. The disadvantage, however, is the significantly shorter battery life compared to DSLRs.
The decision between the two systems ultimately depends on your personal needs and preferences.
Here are some excellent camera models from Nikon, Canon and Sony that are perfect for beginners in nature photography. Which brand you choose is entirely up to you, all models are capable of producing outstanding images. I opted for Nikon – because Nikon simply felt best in my hand.
Nikon Z50
The Nikon Z50 is a mirrorless camera that is characterized by its compact size and outstanding image quality. With an ISO range of 100 to 51,200 and a fast autofocus system, it is ideal for capturing moving animals in nature. The weatherproofing ensures that you can take pictures even in changeable weather. I used this camera on a trip to the Alps and was impressed by the image stabilization, which ensures sharp images even at longer focal lengths.
Click here for the Nikon Z50 demo
Canon EOS M50 Mark II
The Canon EOS M50 Mark II is another great option for nature photographers. This mirrorless camera offers Dual Pixel autofocus, which enables fast and precise focusing. With an ISO range of 100 to 25,600, you can capture stunning shots even in low light. The camera is lightweight and easy to use, making it perfect for longer hikes.
Click here for the Canon EOS M50 Mark II demo
Sony Alpha 6400
The Sony Alpha 6400 is known for its fast autofocus and impressive image quality. With an ISO range of 100 to 32,000 and excellent image stabilization, this camera is perfect for nature photography. The ability to flip up the screen is particularly useful for creative shots from low angles.
Click here for the Sony Alpha 6400 demo
No matter which model you choose, it is important that you feel comfortable with your camera and use the functions that help you capture the beauty of nature.
Sensor size and image quality
Sensor size is one of the most fundamental parameters when choosing a camera for wildlife photography and influences several physical properties of the imaging. The photosensitive area directly determines the amount of incident light per unit of time – a full-frame sensor (36×24mm) collects about 2.3 times more photons than an APS-C sensor (22.2×14.8mm for Canon, 23.6×15.7mm for Sony/Nikon) and four times more than a Micro Four Thirds sensor (17.3×13mm).
The signal-to-noise ratio (SNR) improves in proportion to the square root of the number of photons, which is why larger sensors have significantly less noise at identical ISO settings. A full-frame sensor at ISO 6400 often delivers comparable noise characteristics to an APS-C sensor at ISO 3200. This is particularly relevant in available light situations at dusk, when fast animals such as birds or mammals need to be photographed.
The dynamic range also benefits from the larger sensor area. Modern full-frame sensors often achieve 14-15 f-stops of usable dynamic range, while APS-C sensors are typically 12-13 stops. In animal photography, this enables better detail in high-contrast scenarios – for example, a dark animal against a light background.
The crop factor acts as a digital focal length extender due to the reduced image angle of smaller sensors. A 400mm telephoto lens results in effective focal lengths of 600mm (APS-C Canon: 1.6×), 640mm (APS-C Sony/Nikon: 1.5×) or 800mm (MFT: 2×). This can be advantageous for bird or wildlife photography, as expensive super telephoto lenses can be partially substituted.
However, the depth of field is also reduced with a smaller sensor at the same aperture – an aspect that is relevant for the cropping of subjects. The diffraction limit is also reached earlier: while full-frame format often produces sharp images up to f/11, the optimum with APS-C is often already at f/8, with MFT even at f/5.6-f/8.
The pixel density (pixels per mm²) is higher with smaller sensors, which theoretically places higher demands on the lens resolution. A 24MP APS-C sensor has approximately the same pixel density as a 54MP full-frame sensor, which can make diffraction and lens aberrations more visible.
What beginners should look out for
If you’re just starting out with nature photography, you don’t need a professional camera with lots of high-end features. Instead, pay attention to the following factors:
- Continuous shooting speed: At least 6 images per second are ideal for capturing the perfect moment
- Autofocus: Modern cameras with AI support can focus on animals and their eyes quickly and effectively – with my Nikon Z8 this is simply incredible
- Weather resistance: For nature photography, the camera should at least withstand drizzle
Finally, remember that your equipment can grow with your ambitions. Start by choosing a camera that you fully understand – when the subject appears, every second counts.
Lenses for various animal motifs
The heart of any wildlife photography equipment is undoubtedly the lenses. They play a key role in determining which subjects you can successfully capture and with what quality. Depending on the animal species and environment, you will need different focal lengths and lens types.
Telephoto lenses for wildlife photography
Fixed focal lengths are often superior to zooms for wildlife photography. Not only do they offer superior sharpness, but also greater speed, which is crucial when shooting at dusk or in low light. A 300mm f/4 lens is an excellent choice for beginners as it offers a good balance between reach and handling. A 400mm f/5.6 is also a popular option, often available at a lower price. And for those looking for maximum reach, the 500mm f/4 is a fantastic choice, although it is slightly heavier and more expensive. The lenses also work well with teleconverters, which can be used to extend the focal length.
The 180-600mm or 200-400mm variants of zoom lenses can be recommended.
Price comparison: Fixed focal lengths vs. zooms
Another advantage of fixed focal lengths is the price. You can often find older models on the second-hand market that cost the same as new zoom lenses but offer better optical performance. This makes them a cost-effective choice for beginners who want to get the best results without spending a fortune. I would rather do without a stabilizer and go for a lens that is sharper, which makes a real difference, especially with the high pixel sensors.
Macro lenses for insects and details
Special macro lenses are essential for fascinating close-ups of insects and smaller animals. These enable a life-size representation of the subject on a 1:1 scale on the sensor. This means that all details appear on the camera sensor in the same size as in reality.
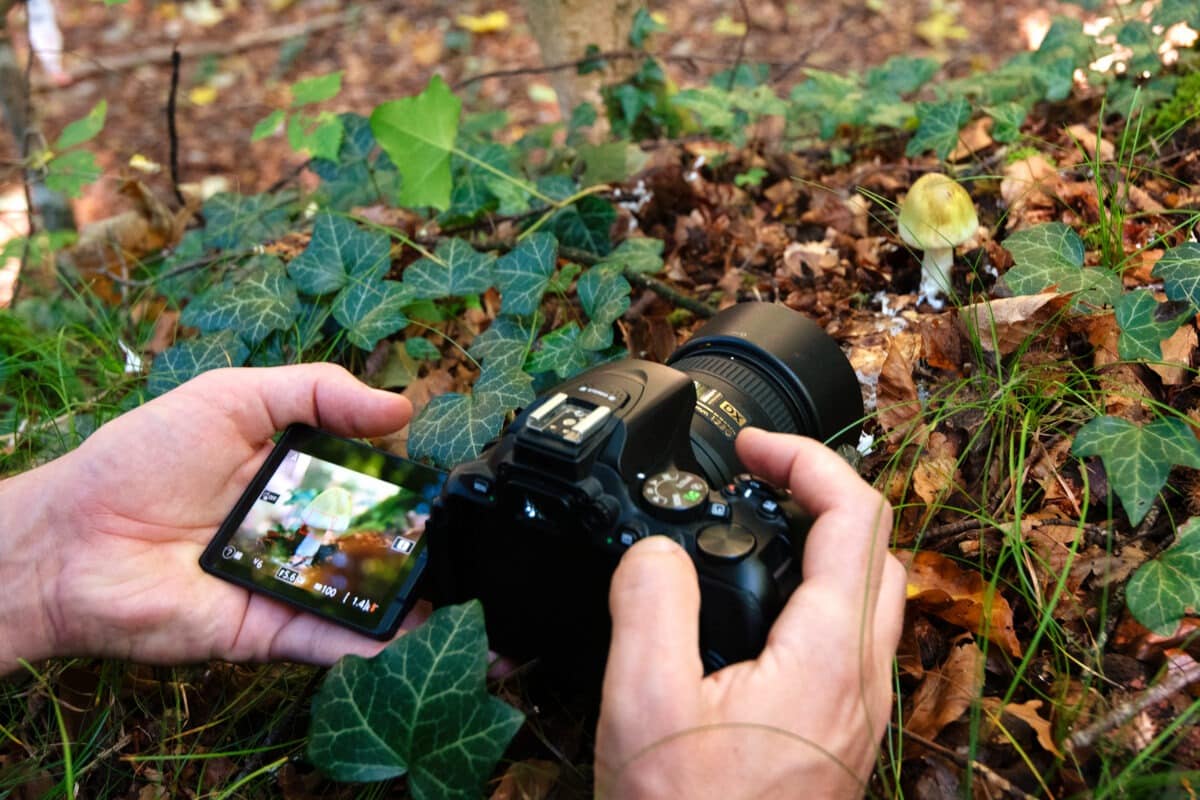
Popular entry-level models include the Nikon AF-S DX Micro Nikkor 85 mm 3.5 ED VR or a classic 105 mm macro. The extremely shallow depth of field is particularly challenging with macro shots, which makes the use of a tripod very sensible.
Important accessories for sharp images
In addition to the camera and lens, special accessories are crucial to the quality of your animal photos. In order to achieve razor-sharp images, some accessories are absolutely essential for animal photography equipment.
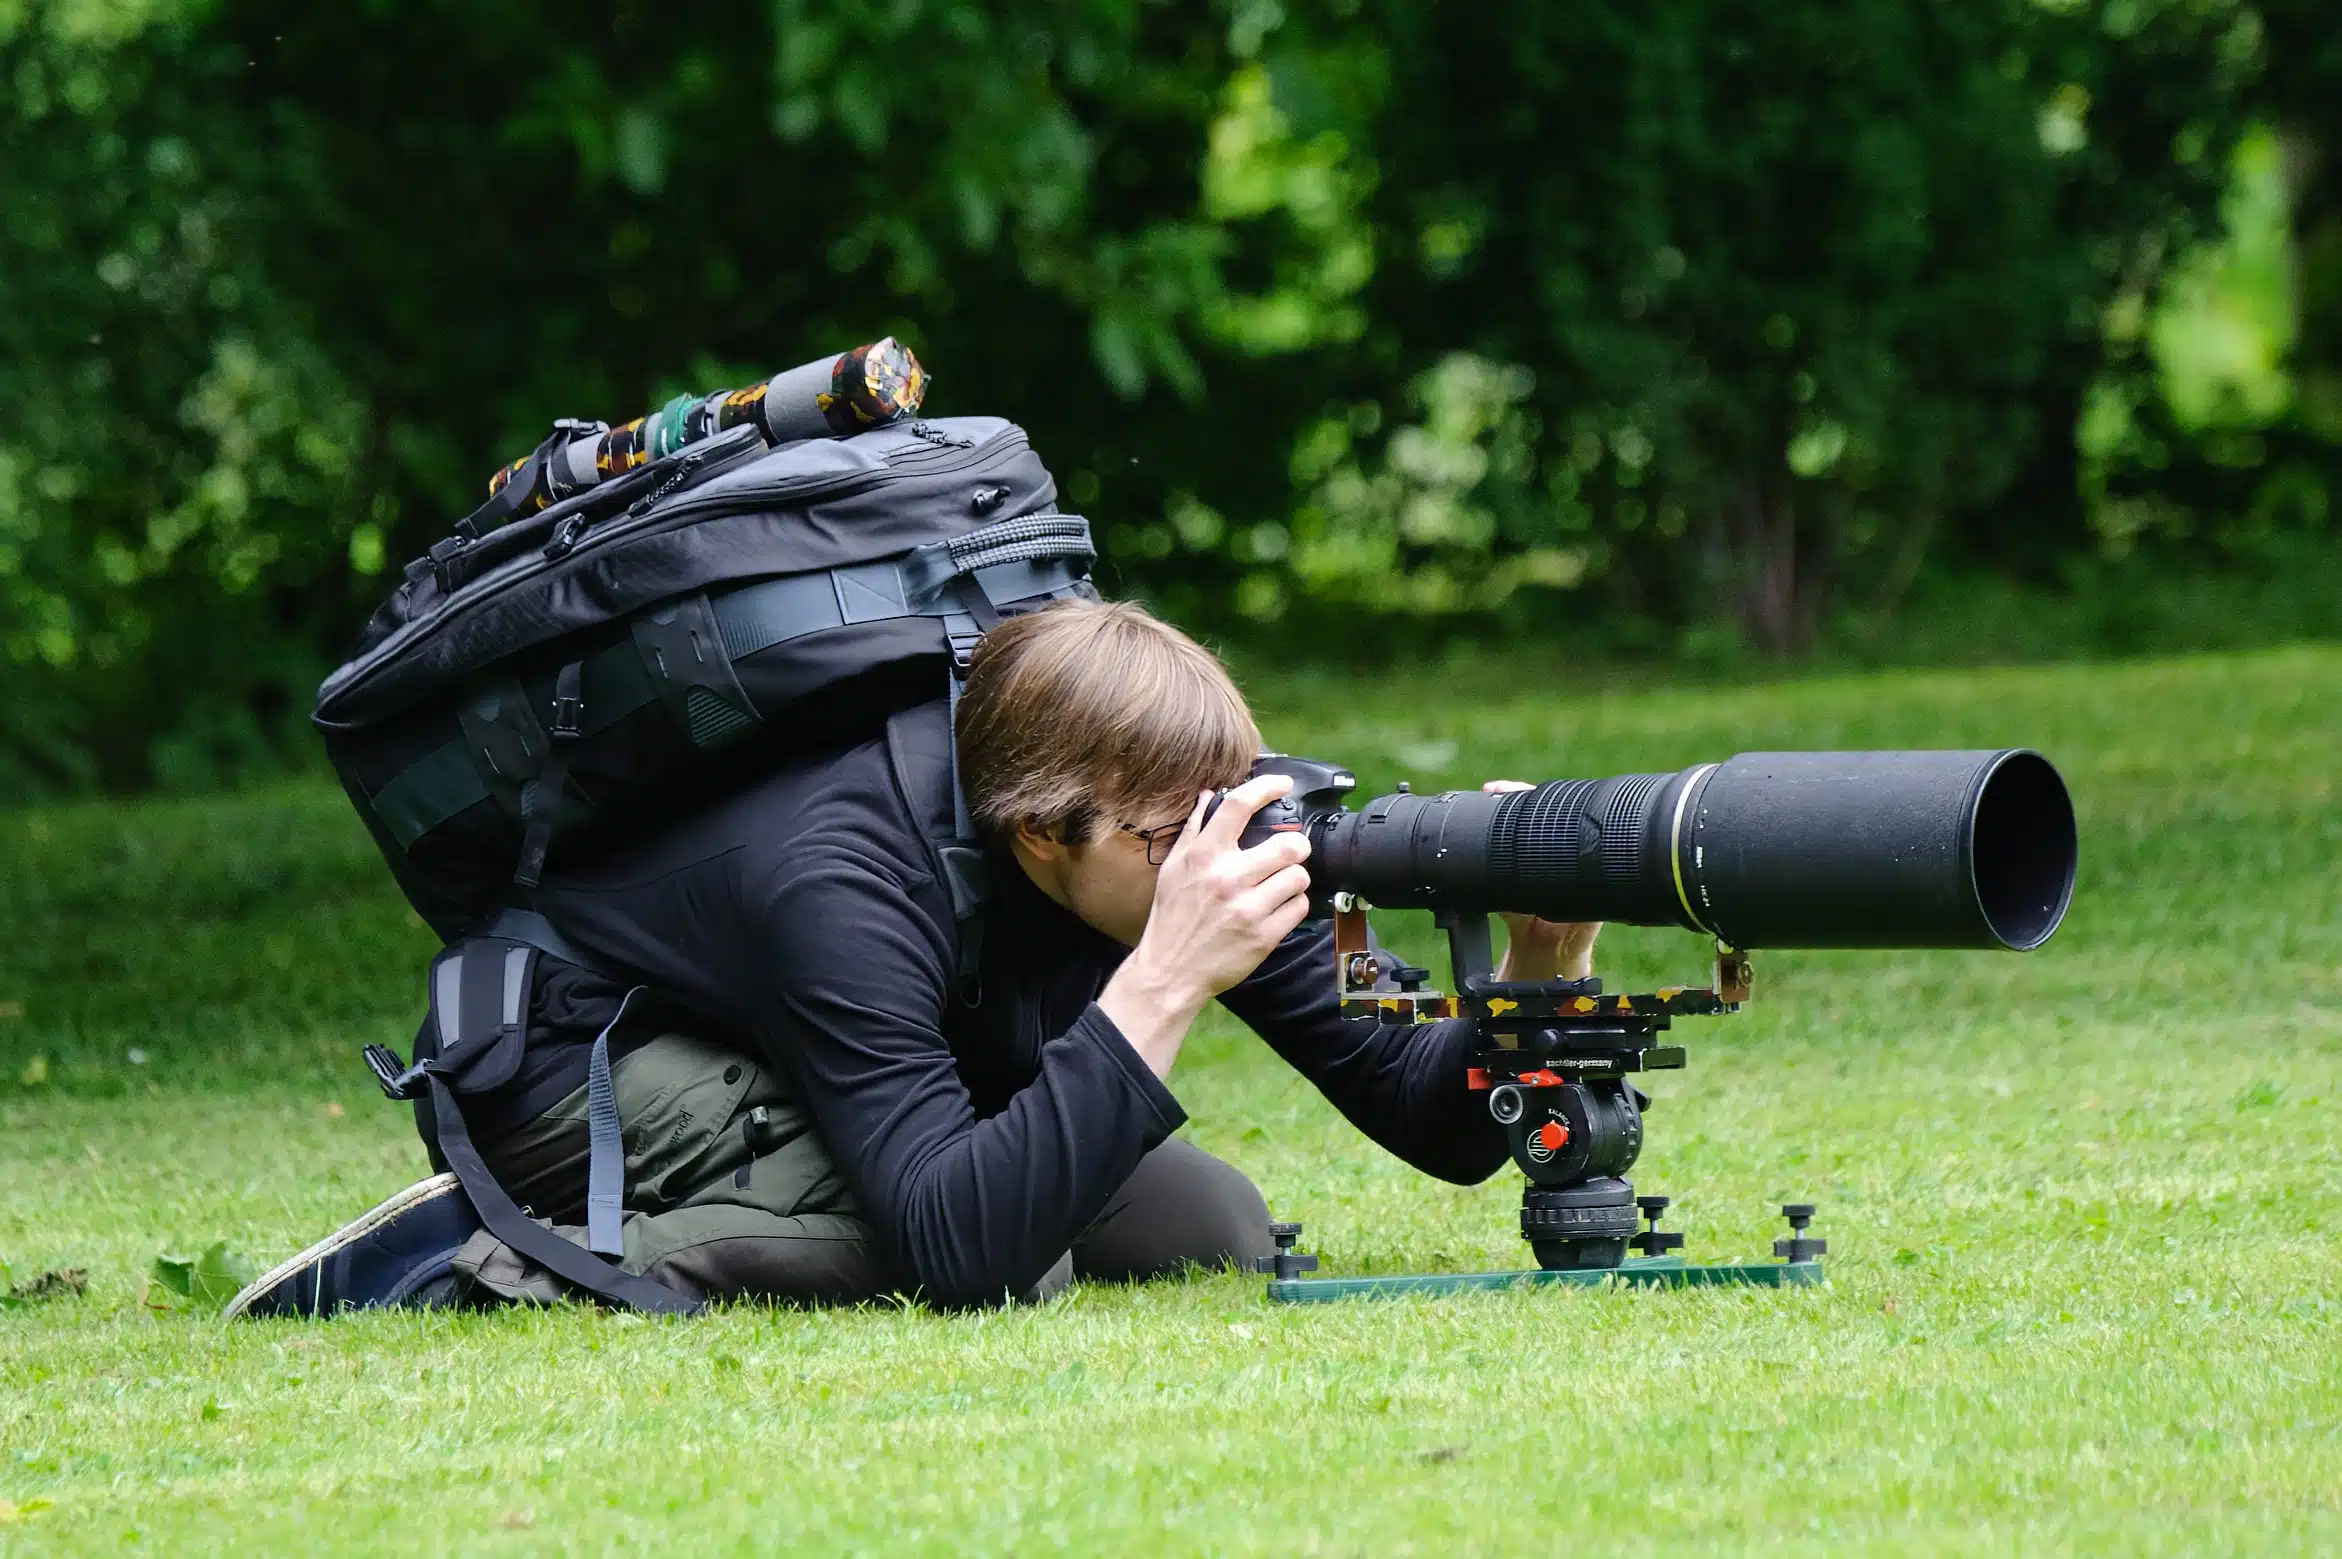
Tripod and monopod
A stable tripod is almost indispensable when using telephoto lenses. The heavier the lens, the more difficult it is to hold it steady. For wildlife photography, the tripod should be robust and offer a secure stand. Carbon tripods reduce vibrations better than aluminum models and are also more comfortable to handle in cold weather.
A monopod, on the other hand, offers more flexibility if you need to change your position quickly. It is particularly helpful when photographing moving animals.
I use a gimbal tripod head for optimum stability. This keeps the camera/lens combination in balance and enables smooth movements when tracking animals.
Remote shutter release and image stabilizer
A remote shutter release prevents camera shake and allows you to capture the perfect moment with precision. Especially if you wait a long time for a bird to land on a branch, for example, an external trigger is worth its weight in gold. You don’t have to keep flattening your nose.
The image stabilizer (VR) is a technology that detects the smallest camera movements and compensates for them by moving the sensor. With full-frame Nikon Z cameras, VR enables shots with exposure times that are up to five stops longer.
Filter for better light control
You don’t necessarily need filters for wildlife photography. For landscapes, three types of filter are mainly relevant:
- Polarization filter (polarizing filter): Removes reflections and enhances colors. Wet surfaces in particular appear more saturated and colorful. The filter is adjusted by turning it.
- Gray filter (ND filter): Increases the shutter speed by reducing light. Ideal for depicting movement, such as flowing water or moving clouds.
- Gray gradient filter: Darkens the sky and reduces the difference in brightness between sky and earth, which is particularly useful for landscape shots with animals.
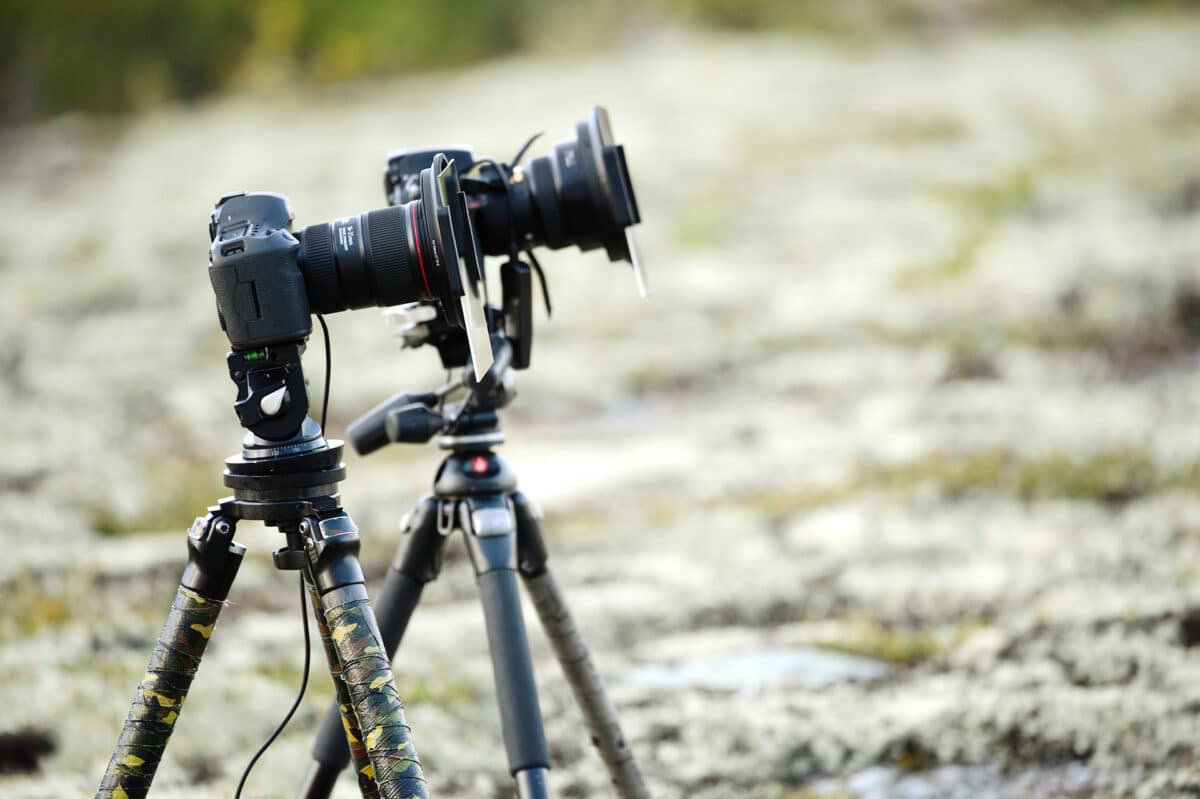
These filter effects cannot be imitated in image processing, or only to a limited extent, which is why they should be part of the basic equipment of every nature photographer.
Practical supplements for on the go
Successful wildlife photography requires more than just a good camera and lenses – the right accessories for on the go are crucial for success in the field. With well thought-out additional equipment, you can complete your wildlife photography kit and be prepared for all situations.
Camera backpack and protective clothing
A high-quality camera backpack not only protects your equipment, but also ensures comfort on long tours. Pay particular attention to a well-padded back section with ventilation and adjustable straps. Hip and chest straps are almost indispensable for wildlife photographers, especially if the equipment weighs over 20 kg.
For clothing, I recommend neutral colors that blend in better with the surroundings. Large pockets for spare batteries, memory cards and other accessories are also extremely practical – so you don’t have to open your backpack every time.
Spare batteries and memory cards
When choosing replacement batteries, you should pay attention to quality. Cheap models can suddenly lose power and let you down at the crucial moment. High-quality original batteries are more expensive, but in my experience they offer reliability and longevity.
For memory cards, I recommend SanDisk as a tried and tested brand. For me, it is often better to use several smaller cards (e.g. 32 GB) than one large one (256 GB), as the risk of complete data loss is reduced.
Camouflage and behavior in nature
In our latitudes, wildlife photography is almost impossible without camouflage, as wild animals immediately flee at the sight of humans. I usually use a 3D leaf camouflage suit, which is lightweight and offers full freedom of movement, complemented by a camouflage mask and gloves.
I have written a separate article on choosing the right camouflage tent.
Make sure you also camouflage your tripod – at least one leg usually sticks out and can scare animals away with its straight outline and shiny surface. If you are photographing in hunting areas, you should also wear an orange cap or jacket – this color is not a signal color for wild animals, but protects you from hunting accidents.
In addition to the equipment, however, patience is crucial. Wildlife photography mainly consists of waiting, waiting and waiting again. Also, always pay attention to the wind direction so that animals cannot scent you.
Conclusion
The right equipment is undoubtedly the foundation for impressive wildlife photography. After our detailed examination, one thing is clear: it is not the most expensive camera that makes the difference, but the well thought-out combination of suitable components.
First of all, you should invest in a solid camera body – mirrorless or DSLR, depending on your needs. However, the lens is actually even more important. Camera bodies can be replaced more quickly than lenses, they are simply more durable.
Your equipment does not have to be complete right from the start. Instead, you can start with basic equipment and gradually add to it. Sturdy tripods, filters for light control and a comfortable photo backpack for longer excursions are particularly important.
In addition, practical additions such as spare batteries, sufficient memory cards and suitable camouflage clothing play a decisive role in successful photo safaris. These details are often underestimated, although they can make the difference between success and failure.
Ultimately, however, animal photography is not just about technical perfection. Patience, respect for the animals and a basic understanding of their behavior are just as important. The best equipment is of little use without the willingness to wait for hours for the perfect moment.
Therefore, start with what you have and expand your equipment step by step. Although high-quality equipment can improve your images, it’s ultimately your eye, creativity and perseverance that will create truly exceptional wildlife photos.
FAQs
For beginners, mid-range cameras such as the Nikon D7500 or Nikon Z50 are recommended. These offer good functions for wildlife photography, such as rotating and tilting displays and silent shooting modes, without being too complex.
A telephoto lens with a focal length of 300-800mm is essential for wildlife photography. A macro lens is important for close-ups of insects. A zoom lens such as the 70-200mm f/2.8 or a 300mm f/4 is a versatile option.
A stable tripod is particularly important when using telephoto lenses. It prevents camera shake and enables sharp shots even with longer exposure times or in poor lighting conditions.
Essential accessories include a robust camera backpack as well as sufficient spare batteries and memory cards. Camouflage clothing can also be very useful in many situations.
First concentrate on learning the basics with the equipment you have. Practice patience, study animal behavior and improve your composition skills. Good photos come more from skill and perseverance than from expensive equipment.