Editing nature photos is an art in itself. As a photographer specializing in the beauty of nature, my goal is to present the unique moments I capture in their best form. In this article, I share my workflow for editing images using Capture One, a truly powerful tool that helps me bring out the colors and details in my shots.
The decision for Capture One
Choosing the right image editing software is crucial to a photographer’s success. I deliberately chose not to use Lightroom because I found Capture One to have superior color representation and finer adjustment options. The software allows me to precisely control the colors and details of my nature photos, which is very important for the quality of my work.
Advantages of Capture One
- Superior color reproduction: Capture One offers impressive color accuracy that allows me to authentically reproduce the vivid colors of nature.
- Finest adjustments: The software offers extensive tools for adjusting contrasts, exposure and color tones, which help me to design each image individually.
- Intuitive user interface: Capture One’s user interface is user-friendly and allows quick access to all important functions.
- Customizability: All tabs are individually customizable and can be adapted to the respective needs of the workflow
Disadvantages of Capture One
- Metadata: Capture One’s metadata management could be significantly improved
- Search: With large catalogs (mine has about 80k images) the search does not perform optimally, it can take a while until all results are there
- Performance: Starting and stopping the application can take a while, with my large catalog it can take five minutes
My workflow in detail
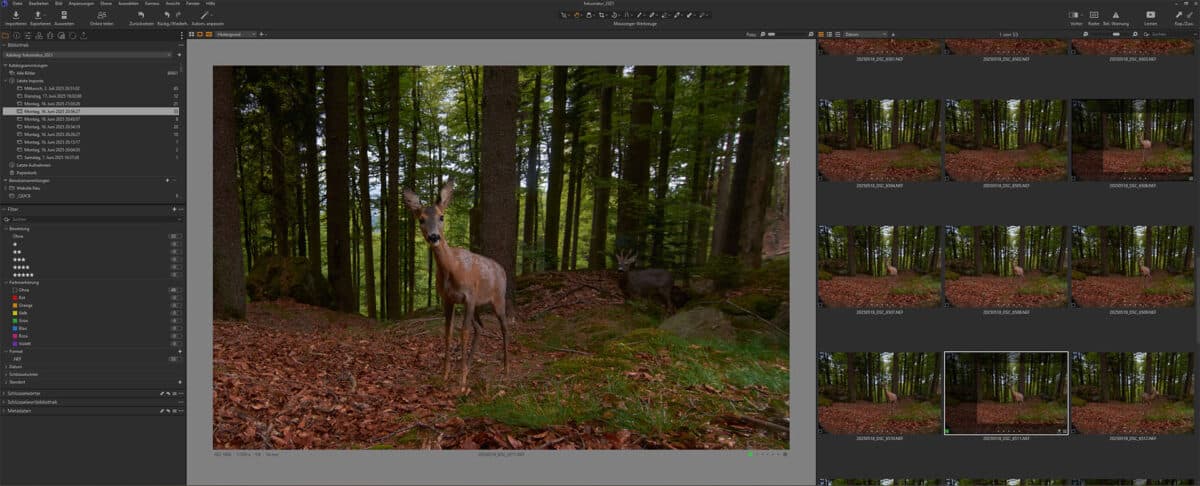
My workflow for editing nature photos with Capture One consists of several steps that I always go through systematically – simply to be as efficient as possible.
1. import the images
The first step is to import the images from my camera into Capture One.
I make sure to store the files in a structured folder system to ensure clarity. I organize images into the folders [shooting year]/[shooting month]-[shooting day] during import and rename the files automatically by replacing the date at the front, e.g. 20250723_DSC1234.NEF. This way I can ensure that image names in my database are unique and that I always come across the same image when I search for an image name.
I also add my copyright to the IPTC metadata.
2. basic processing
After the import, I start with the basic editing. Here I use a template I have created, which I apply to all the images in a shoot. This template includes basic settings such as
- Metadata: I assign keywords to find the images again later, e.g: “Lynx, cat, Lynx lynx, Bavarian Forest, camera trap, winter, snow, forest”
- Contrast adjustment: I adjust the contrast with the tone curves to increase the image depth (then black is really black and white is white).
3. individual adjustments
Once the basic editing is complete, I go through each image individually and make specific adjustments. These include:
- White balance: I correct the white balance to make the colors as realistic as possible.
- Align straight: If necessary, I straighten the picture.
- Exposure compensation: I optimize the exposure to ensure that the highlights and shadows are well balanced.
- Dust removal: if there are rough sensor spots on a blue sky, for example, I use Capture One to remove them
Retouching and fine work
Once the basic editing is complete, I open the images that need it (approx. 10-15%) in Adobe Photoshop for further retouching. Here I concentrate on the fine details that enhance the image.
1. removal of disruptive factors
In the retouching phase, I remove sensor spots that could distract from the main motif.
2. detail improvement
Another important step is the improvement of details that positively influence the image effect. I work specifically on:
- Eyes: I emphasize the eyes to give the picture more expression.
- Important details: I emphasize important details that enrich the overall picture.
Integration of Topaz Photo AI
To further optimize my image processing, I integrate Topaz Photo AI into my workflow. This software offers powerful sharpening and noise reduction functions that simply improve my images. I can open the tool directly from Capture One and also save it directly back again.
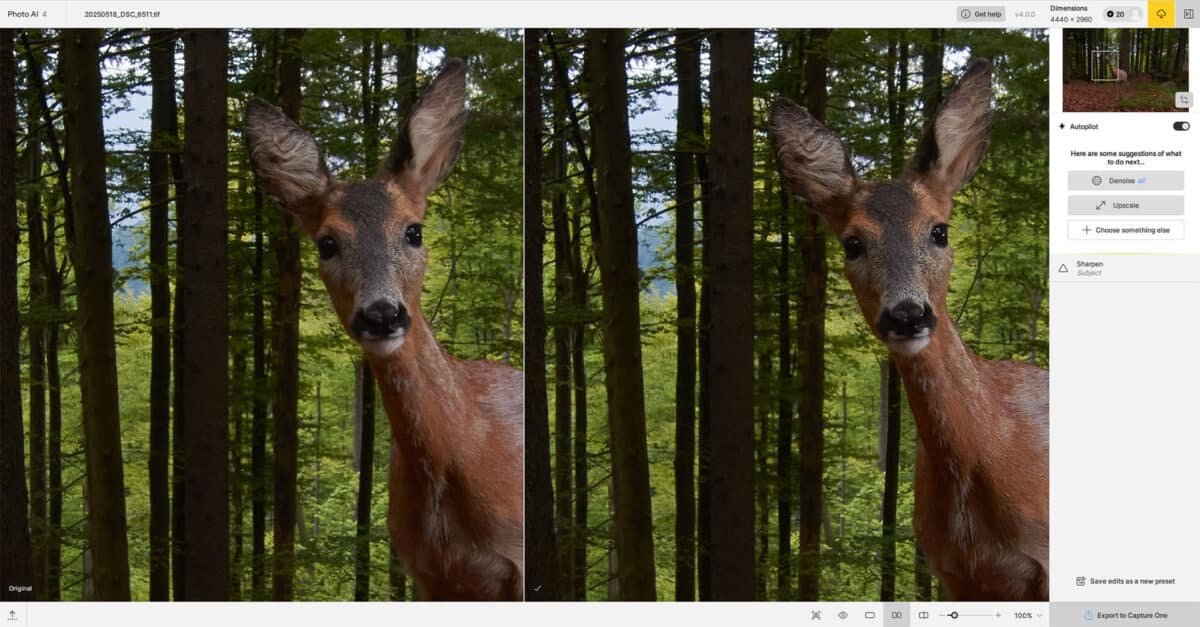
Advantages of Topaz Photo AI
- Advanced sharpening: Topaz Photo AI allows me to selectively increase the sharpness of my images without any loss of image quality.
- Intelligent noise reduction: The software recognizes noise and removes it effectively, which is particularly advantageous when shooting in low light.
Conclusion
Editing nature photos with Capture One is a creative process that requires a lot of patience and precision. The combination of Capture One and Topaz Photo AI allows me to bring out the beauty of nature in my images. My workflow allows me to present the unique moments I capture in their best form, capturing the colors and details as I experienced them in nature.
With this approach, I am able to take my pictures to a new level and capture the fascination of nature in every single photo.


