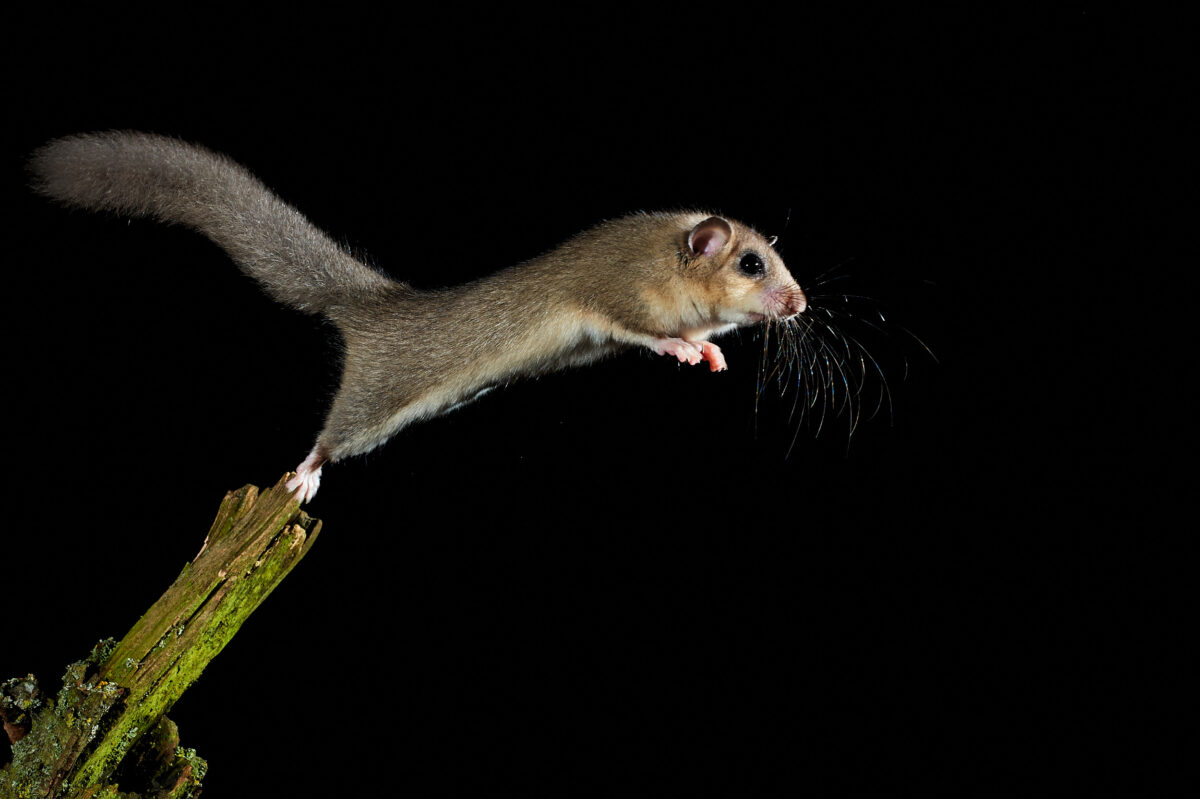
Nature photography unfolds a very special magic after sunset. While most photographers pack up their equipment, a fascinating phase begins for wildlife photographers: the world of nocturnal animals awakens. Foxes slink through the twilight, owls glide silently through the darkness and badgers leave their dens. This hidden side of the animal world offers unique photo opportunities that few nature photographers are able to capture.
However, nocturnal wildlife photography poses particular challenges in terms of technology and skill. Extreme low light, fast movements and shy animals require special equipment and in-depth know-how. But it is precisely these difficulties that make successful night shots so valuable and impressive. The rewards are atmospheric images that show the mysterious side of nature and clearly stand out from the crowd.
In this comprehensive guide, you will learn everything you need to know about wildlife photography at night. From the best equipment and technical camera settings to flash techniques and ethical aspects – we shed light on all facets of this challenging discipline. Regardless of whether you already have experience in wildlife photography or are just starting out in nocturnal nature photography: Here you’ll find tried-and-tested tips and techniques to take your night shots to the next level.
Inhalt
- The right equipment for nocturnal wildlife photography
- Light at night: Mastering natural and artificial light sources
- Optimize camera settings for the night
- Understanding animal behavior: The key to successful night photography
- Post-processing: getting the most out of night shots
- Conclusion and motivation: the night is yours
The right equipment for nocturnal wildlife photography
The equipment is crucial for wildlife photography in the dark. While compromises are still possible in daylight, the wheat is quickly separated from the chaff at night.
Camera body: low-light performance is crucial
For night photography of wildlife, you need a camera body with excellent low-light performance. Modern full-frame cameras have clear advantages here, but some APS-C models also deliver acceptable results. Pay attention to the following features:
The ISO capability should be usable at least up to ISO 6400, better still up to ISO 12800 or higher. Noise is unavoidable, but modern sensors handle high ISO values surprisingly well. A large sensor (full-frame or APS-C) collects more light and produces less noise at the same ISO setting than smaller sensors.
The autofocus system must also work reliably in low light. Cameras with dedicated low-light AF points that work down to -4 or -6 EV have a clear advantage here. A fast buffer and high continuous shooting rate help to capture the perfect moment when the animal is moving.
Lenses: It has to be fast
When choosing a lens for nocturnal wildlife photography, speed is the top priority. A fast lens with an aperture of f/2.8 or better is almost indispensable. The wider the aperture, the more light reaches the sensor, which enables shorter exposure times and lower ISO values.
For larger animals at medium distances, focal lengths between 70-200mm f/2.8 are suitable. 300mm f/4 or even 400mm f/2.8 are ideal for shy wild animals, but these lenses quickly become very expensive and heavy.
Flash equipment: bringing light into the dark
Wildlife photography with flash is a controversial but effective topic. For many situations, an external system flash or even a remote flash system is necessary. The camera’s internal flash is practically never sufficient for wild animals.
A powerful external flash with adjustable output and swivel head gives you full control. The option of TTL exposure metering and manual control is important. For softer light, diffusers or softboxes are recommended to diffuse the hard flash light and make it appear more natural.
Advanced wildlife photographers work with several unleashed flashes that are triggered by radio. This allows animals to be illuminated from different angles and to stand out vividly from the background.

Join me on my photo tours and immerse yourself in the world of wild landscapes and unique encounters. Together we will hone your photographic skills – practical, creative and full of inspiration. Secure your place now and rediscover the magic of light and nature.
Aids for the night
In addition to camera equipment, you need practical helpers for the dark. A headlamp with a red light function is indispensable – red light disturbs nocturnal animals less and preserves your own night vision. A powerful flashlight helps with focusing and orientation.
A stable tripod is a must for longer exposure times. Even if you are working with a flash, you will need a tripod for positioning and waiting. A gimbal head or video head enables smooth panning shots of moving animals.
Light at night: Mastering natural and artificial light sources
Lighting is the biggest challenge and at the same time the most creative element in nature photography at night.
Using natural light: The power of the moon and twilight
There are also natural light sources that you can use at night. The blue hour immediately after sunset still offers enough residual light for atmospheric shots. The sky glows an intense blue while the first stars become visible – perfect for silhouettes or semi-illuminated scenes.
Moonlight is an underestimated light source in wildlife photography. When the moon is full and the sky is clear, it is surprisingly bright. With long exposure times (several seconds) and a high ISO, you can create moonlight shots that look almost like daytime but retain the mystical atmosphere of the night. However, this only works with static animals or landscape shots.
The phases of the moon not only influence brightness, but also animal behavior. Many nocturnal animals are more active when the moon is full, as they can see better. Plan your photo tours according to the phases of the moon.
Starlight can also become visible with very long exposures (30 seconds and more). Combine this with foreground elements such as a tree or rock with animals passing by for dramatic night shots with a starry sky.
Join me on my photo tours and immerse yourself in the world of wild landscapes and unique encounters. Together we will hone your photographic skills – practical, creative and full of inspiration. Secure your place now and rediscover the magic of light and nature.
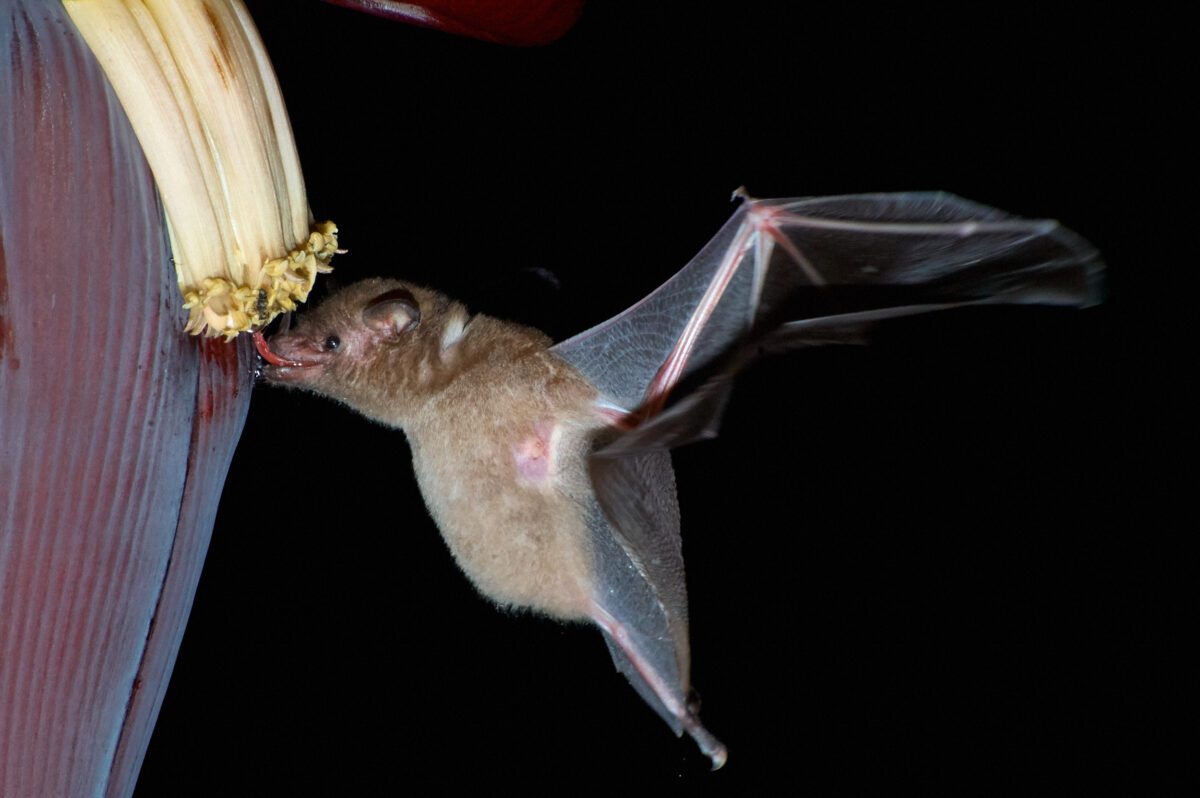
Using artificial light: Flash techniques for wildlife photography
Animal photography Flash photography is an art in itself. The flash must be powerful enough to illuminate the animal at a distance of several meters, but must not frighten or dazzle it. Here are some tried and tested techniques:
Direct flash: The simplest approach is the front-mounted flash. This provides hard, direct light that brings out details sharply and creates eye reflections. Disadvantage: Flat illumination without depth, hard shadows and the dreaded “red-eye effect” with some animals.
Unleashed flash: Positioning the flash to the side or slightly raised creates three-dimensional light with beautiful shadows. The animal appears more three-dimensional and natural. You can combine several flashes: a main flash at the side, a fill flash at the front with reduced power and possibly a background flash.
Diffuse flash light: Softboxes, diffusers or bouncing over a bright surface (possible in candid photography) create soft, flattering light. This looks more natural than hard direct light and reduces harsh shadows.
Pay attention to the flash output: too strong and the animal looks overexposed and burnt out, too weak and it blends in with the dark background. TTL auto flash is a good starting point, but manual flash control is better for consistent results.
Light positioning: the effect of different light directions
The direction of the light changes the image effect dramatically. Front light (light from the front) illuminates the animal evenly, showing all the details, but often looks flat and boring. It is the safest option for beginners as it does not create difficult shadows.
Side light (45-90 degrees to the side) is the preferred direction of light for expressive wildlife shots. It emphasizes the structure of the fur, traces the body shape and creates depth through shadows. The eyes should still receive enough light to shine.
Backlighting (light from behind) creates spectacular silhouettes or rim-lighting effects where the animal is surrounded by a glowing rim. This often requires a fill flash from the front to reveal details in the animal. Backlighting is challenging, but the results can be breathtaking.
Overhead light (from above) imitates natural moonlight and looks particularly natural. This can be achieved with unleashed flashes on light stands or flash units mounted in trees.
Available light: using urban lighting creatively
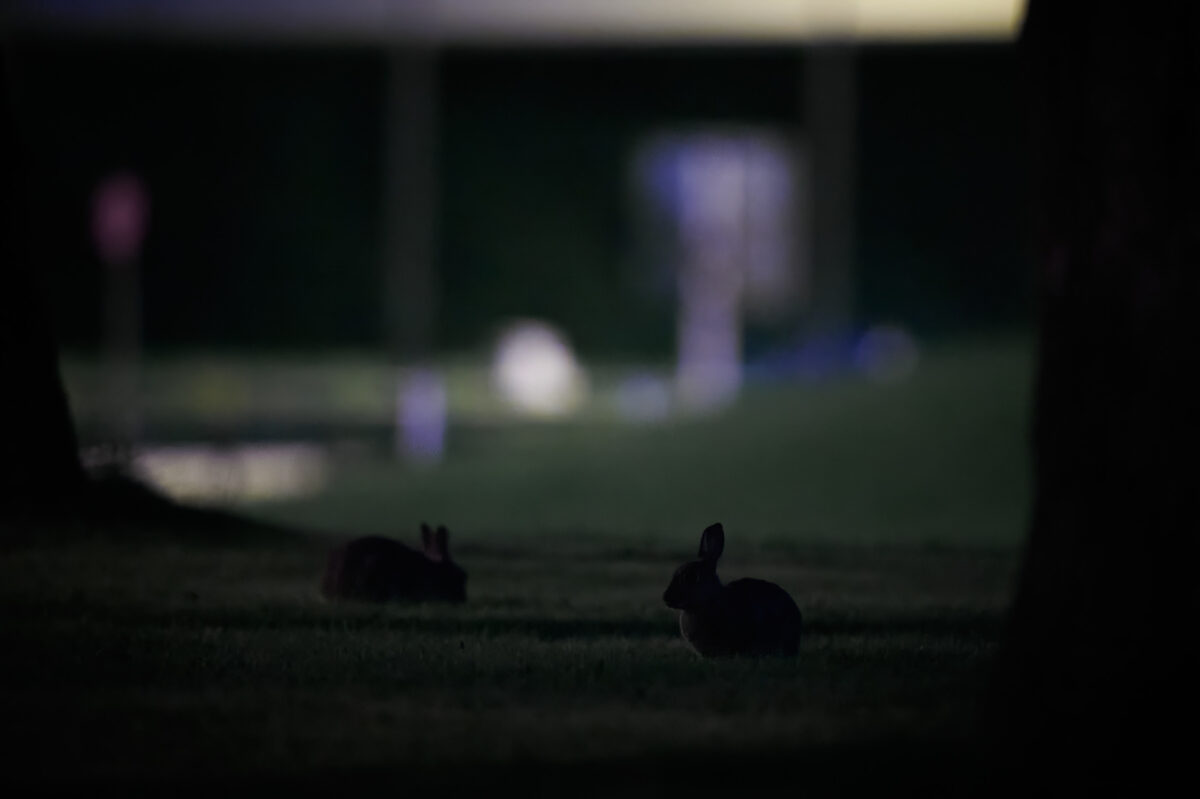
In urban or peri-urban areas, artificial lighting can offer interesting possibilities. Streetlights, building lighting or car headlights can indirectly illuminate wild animals. Foxes in the city, martens or raccoons often use illuminated areas.
These lighting situations have their own character with warm color temperatures (sodium vapor lamps), cool LED tones or mixed light. Experiment with the white balance for different moods – warm light enhances the nocturnal atmosphere, while neutral white balance looks more natural.
The advantage of available light: no flash means less disturbance and more natural animal behavior. The disadvantage: you need very high ISO values and long exposure times, which makes fast-moving animals difficult.
Optimize camera settings for the night
The right configuration of your camera is the difference between success and failure when photographing wildlife at night.
ISO values: The balancing act between brightness and noise
There is no way around high ISO values in night photography. While you might stick to ISO 100-400 during the day, you regularly have to go to ISO 3200, 6400 or even higher at night. This creates image noise, but a slightly noisy, sharp image is always better than a blurry, low-noise image.
Modern cameras handle high ISO values surprisingly well. Test in advance up to which ISO level your camera delivers acceptable results. Many full-frame cameras are usable up to ISO 6400, beyond which post-processing becomes more complex. The auto-ISO function can be helpful, but set a sensible upper limit.
In nature photography with flash, you can often keep the ISO lower as the flash is the main light source. ISO 800-1600 is often sufficient here, depending on the flash output and distance to the animal.
Aperture: Light versus depth of field
The aperture is a critical parameter for night shots. An open aperture (small f-number such as f/2.8 or f/4) lets in a maximum amount of light, but drastically reduces the depth of field. At longer focal lengths, the plane of focus can become so thin that only the eyes are in focus, while the nose and ears are already blurred.
This is often an acceptable compromise for wildlife photography at night. If possible, shoot with an aperture of up to f/4 and use the amount of light gained for shorter exposure times.
The high light intensity of the lenses is particularly important for the autofocus performance of the camera. The more light reaches the AF sensor, the better the camera can focus.
Autofocus: when the camera has to grope in the dark
Autofocus reaches its limits at night. Even high-quality cameras have difficulties focusing in low light and low contrast. Use the following strategies:
Activate the AF assist light on your camera or flash. This emits a beam of light or a pattern that helps the AF system to focus. Caution: Some animals are frightened by this. Alternatively, you can briefly illuminate the animal with a flashlight while you focus.
Continuous autofocus (AF-C or AI Servo) is important for moving animals, but demands a lot from the AF system. Single autofocus (AF-S) can be more reliable for static scenes. Choose a central AF point, as these are usually the most sensitive to light (at least with DSLRs – autofocus works differently with mirrorless cameras).
In extreme darkness, manual focusing is often the only option. With Live View and digital magnification, you can focus precisely on the animal’s eyes. Use a high ISO for the live view image in order to recognize anything at all.
RAW format: The rescue in post-processing
The RAW format is absolutely indispensable in night-time wildlife photography. RAW files save all sensor data without compression and offer maximum flexibility in post-processing. This flexibility is worth its weight in gold, especially in the extreme conditions of night photography.
In RAW format, you can correct the exposure by several f-stops without the image falling apart. The white balance can be adjusted without loss – important because artificial light and flash often produce unnatural color casts. Noise reduction in RAW converters such as Lightroom or Capture Oneis significantly more effective than the camera’s own JPEG processing.
Understanding animal behavior: The key to successful night photography
Technical know-how alone is not enough – if you want to photograph nocturnal wild animals, you need to understand their behavior.
Nocturnal species and their habits
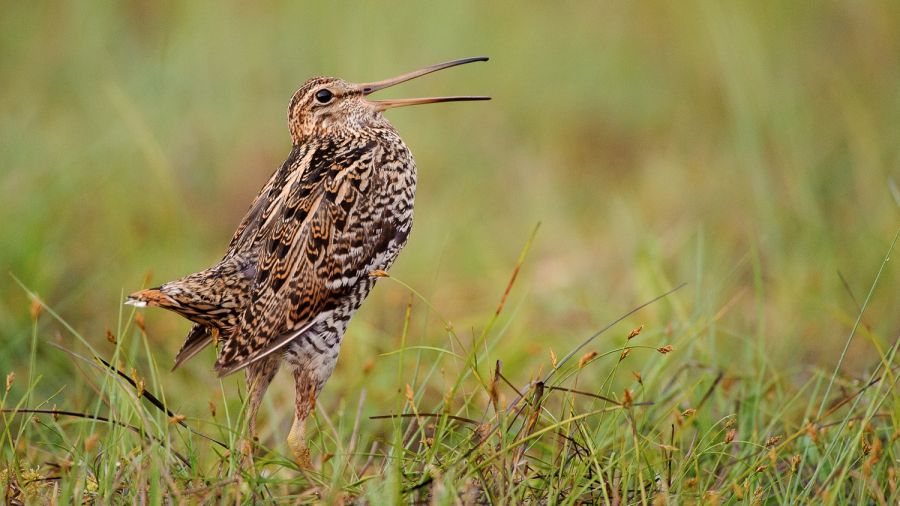
Different animal species have different activity patterns. Crepuscular animals such as deer, hares or foxes are most active at dusk – ideal for photographers as there is still some residual light. Use the time immediately after sunset or before sunrise.
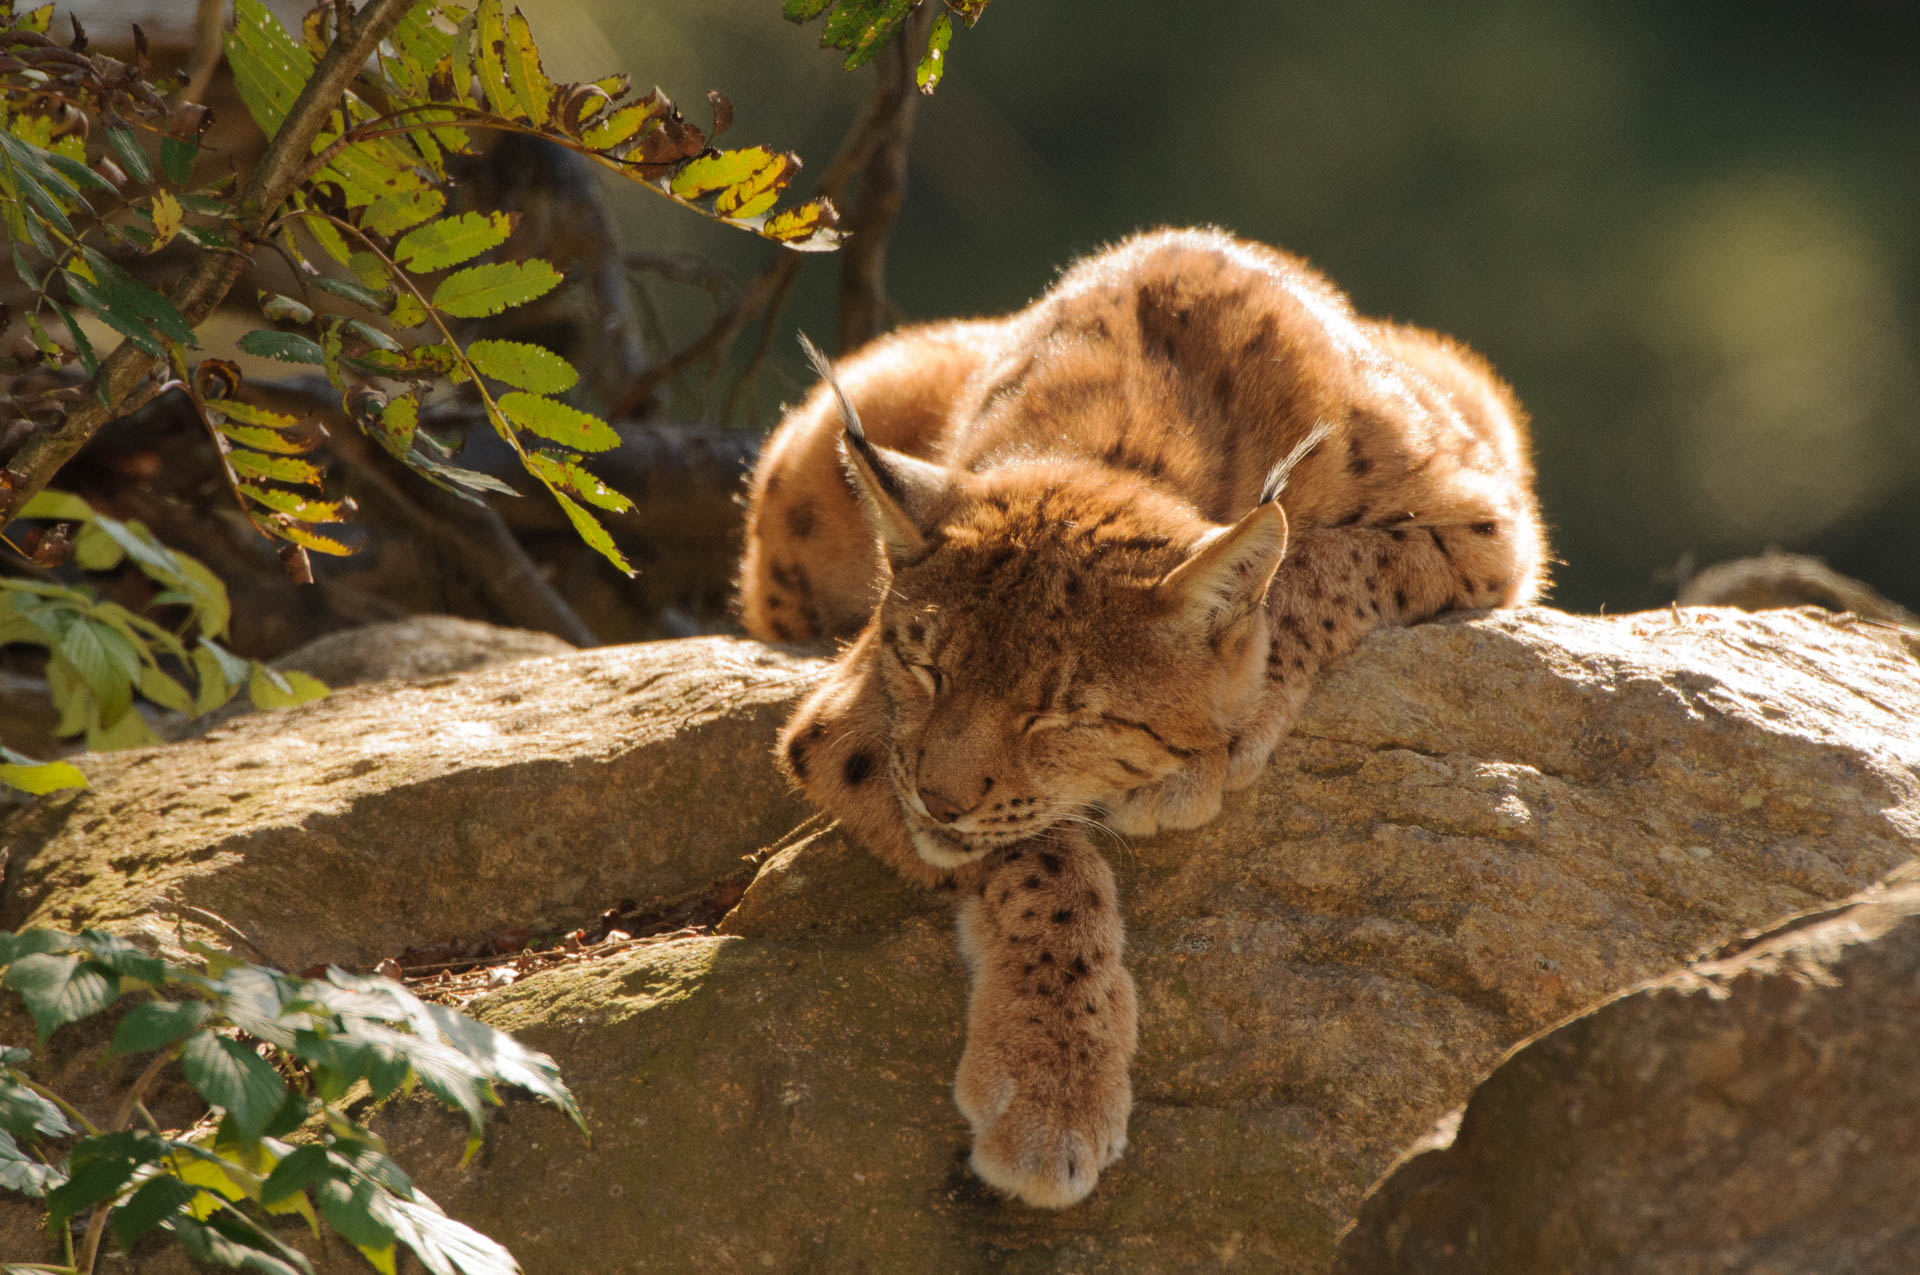
Real nocturnal animals such as badgers, owls, martens and wild boars are out and about in the depths of the night. They have specialized sensory organs for the dark – large eyes, excellent hearing, sensitive noses. For photography, this means: maximum caution, minimum disturbance.
Get to know the preferred habitats. Owls hunt on woodland edges and open fields, badgers have fixed movements between burrows and feeding areas, foxes patrol territories along known routes. Research and observe before you take photos.
Seasons have a strong influence on behavior. In late winter and spring, many animals are more active and less shy during the mating season. In the fall, animals put on winter fat and stay out longer. In summer with short nights, nocturnal animals are sometimes also active at dusk.
Recognize and anticipate movement patterns
Successful wildlife photography means being in the right place at the right time. Observe tracks, trails and scat to identify wildlife movements. Nocturnal animals are creatures of habit and often use the same paths.
Field signs such as scratch marks on trees (badger, wild boar), feeding marks or hair on fences provide clues as to presence and direction of movement. Wildlife cameras with motion detectors can show you when and where animals are moving through – invaluable knowledge for planning your photo sessions.
Pay attention to the wind direction. Animals have an excellent sense of smell and can smell you against the wind from a great distance. Always position yourself with the wind coming from the animal so that your scent is not carried to it.
Patience and observation: the underestimated skills
Night photography of wild animals requires enormous patience. You will spend hours in hides, camouflage tents or simply motionless outdoors. The success rate is lower than with daylight photography – accept this and enjoy your time in nature.
Minimize movements and noises. Animals perceive the smallest changes. Turn off all beeps on your camera, move in slow motion, avoid hectic actions. A thermos flask with warm tea and weatherproof clothing make long waiting times more bearable.
Observe without a camera. Some of the most valuable insights can be gained by simply looking and listening. Understand the behavior before you photograph. Where is the animal looking? Does it seem relaxed or nervous? Is it looking for food or on its way to a destination?
Sounds and communication of the night
The night is anything but silent. Get to know the sounds of nocturnal wildlife. The mating call of the tawny owl, the barking of a fox, the grunting of wild boar or the rustling of a badger in the undergrowth – all these sounds help you to locate animals before you see them.
Your own hearing improves over time. In the silence of the night, you perceive sounds that you would miss during the day. Use this to your advantage: stop, listen, identify, then prepare the camera.
Your own noises can also be used tactically. A soft whistle or clicking of the tongue can make an animal pause for a moment and give you a second to release the trigger. But don’t overdo it – permanent noises are more likely to scare away than help.
Post-processing: getting the most out of night shots
Post-processing is particularly important for night-time wildlife photos in order to get the best out of the difficult shooting conditions.
Noise reduction: Tame grain without losing detail
High ISO values generate image noise – an unavoidable compromise in night photography. Modern noise reduction tools in Lightroom, Capture One or specialized software such as Topaz DeNoise AI can work wonders.
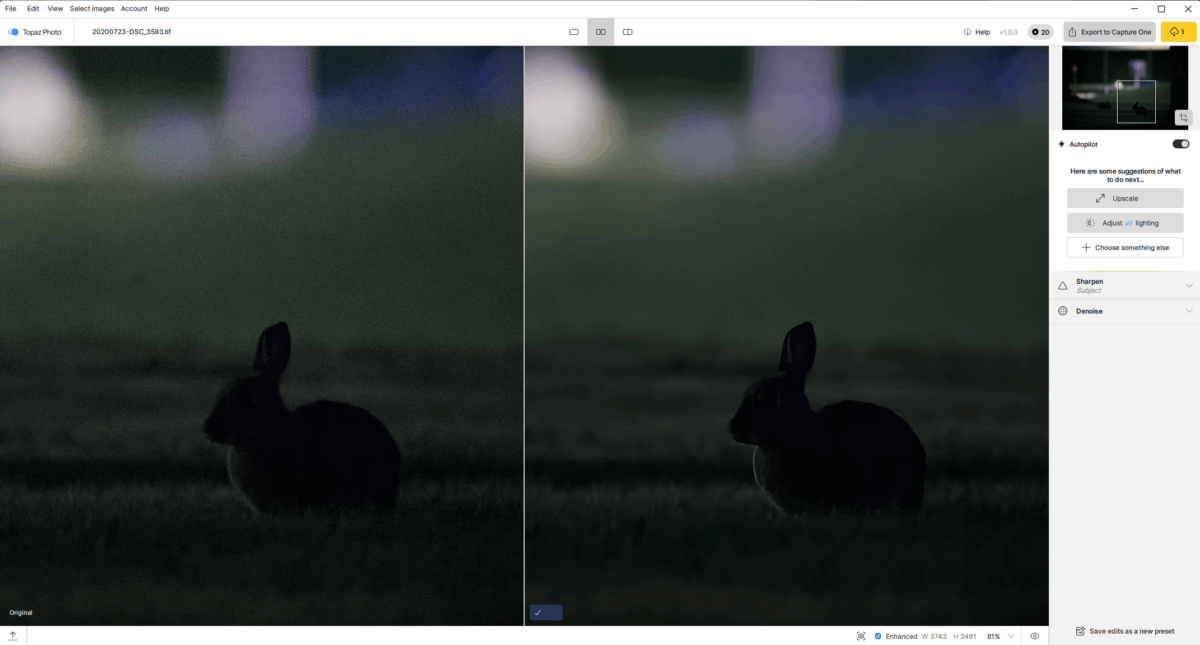
Use noise reduction moderately. Too aggressive denoising softens images and makes them look painted. Fine details such as fur structure or feathering are lost. The aim is to achieve a balance: reduced but still visible noise that gives the image structure without being distracting.
Treat color and luminance noise separately. Color noise (colorful pixels) is usually more disturbing and can be reduced more. Luminance noise (differences in brightness) is similar to analog film grain and is often acceptable or even desirable for a certain look.
Selective noise reduction can help: Reduce noise in the background more while preserving details in the main subject. This can be done using masks and local adjustments.
Exposure compensation: balancing highlights and shadows
RAW files allow massive exposure corrections. Night shots are often underexposed – better than overexposed highlights that can no longer be saved. Raise the exposure in post-processing, pull down the highlights, raise the shadows.
Pay attention to the histogram: the aim is to achieve an even distribution of tonal values without clipped areas. When taking flash photos, the eyes or bright areas of fur are often overexposed – use gradual filters or brushes to darken these areas.
Contrast control is critical. Night shots can look dull – a little more contrast adds punch. But don’t overdo it, otherwise the image will look unnatural and lose details in shadows and highlights.
Optimize white balance: Natural colors at night
The white balance of artificial light and flash is often problematic. Flash light is usually too cool (blue cast), incandescent lamps too warm (yellow cast), LED light varies greatly. In RAW format, you can correct the white balance without loss.
For natural-looking night shots, choose a slightly warm white balance (3500-4500 Kelvin). This corresponds to the human perception of night and creates an atmospheric effect. A white balance that is too neutral makes night shots look cold and sterile.
With mixed light (e.g. moonlight and flash), selective white balancing may be necessary. Correct the animal separately from the background using masks. This is time-consuming, but sometimes necessary for professional results.
Sharpening without artifacts
Night shots usually require more sharpening than daylight photos, as high ISO and noise reduction soften the image. But be careful: oversharpening emphasizes noise and creates halos (light fringes) around contrasting edges.
Use the luminance mask for sharpening in Lightroom or similar tools in other programs. This only sharpens edges and details, not noise in smooth surfaces. The radius should be small (0.8-1.2), the strength moderate (40-70).
Focus selectively: Concentrate the focus on the main subject, especially the eyes. The background can and should remain blurred. This directs the eye and avoids over-sharpened, unsettled areas.
Adjusting colors and contrasts
Night shots thrive on atmosphere, which you can enhance with targeted color and contrast controls. Slight desaturation can give night images a cinematic look, while selective color enhancement (e.g. orange in fox fur, green in eyes) sets accents.
The tone curve is a powerful tool. A slight S-curve (darken shadows, lighten highlights) adds punch and dimension. Experiment with split toning: warm tones in highlights, cool tones in shadows for a cinematic look.
Vignetting can help to draw the eye to the subject and darken distracting background elements. Used discreetly, this increases the focus on the animal without being obvious.
Remember: less is often more. Excessive editing can be seen in pictures. The aim is a natural-looking but technically optimized photo that conveys the magic of the night-time encounter.
Conclusion and motivation: the night is yours
Wildlife photography at night is demanding, time-consuming and sometimes frustrating. But the reward is unique images that few photographers can capture. You enter a world hidden from most people and document the hidden life of the night.
Technical equipment and know-how are important, but not everything. Patience, respect for nature and the willingness to invest many hours with no guarantee of success are just as crucial. Every successful night shot is a small triumph against the adversities of darkness, movement and shy animals.
Start with simple scenarios: Twilight photography at known game crossings, flash photography in frequented places. Learn your equipment inside out so that you can operate it blindfolded. Study the behavior of the animals in your region and always respect their needs and habitat.
Experiment, make mistakes, learn from them. Night photography is trial and error – what works with one animal will fail with the next. Over time, you will develop a feel for light, timing and animal behavior. Your pictures will get better, your success rate will increase and your fascination for this special form of nature photography will grow with every night-time excursion.
The night awaits with its secrets. Pack your camera, respect the wildlife, and capture the magic that unfolds when the sun goes down. Good night and good luck with your night photography adventures!